How to Screen Record on Chromebook – Technologist
So, you have a Chromebook and don’t know how to record the screen on that web-centric device right? Don’t worry! I have your back because I have compiled this comprehensive guide on how to screen record on a Chromebook.
Have you ever been in a situation where you provided someone with instructions and they made a blunder? It happens when they don’t follow the steps, underestimate the process’s importance, or you may have failed to provide proper instructions. Therefore, many workstations and other laptop machines enable individuals to record screens to provide others with appropriate instructions.
Why Screen Record on Chromebook?
Before answering this question, I have a query. Why do individuals prefer screen recording? Now, you got a hint, right? Individuals record screens to save something important with proper instructions and in a valuable manner.
The most interactive part of a recorded screen is that the second person may observe your cursor’s moment on the screen. It’s why giving instructions and presenting something complex has become a cup of coffee. You are free to record screens in various manners, such as:
Guide to Screen Record on Chromebook
If you are a newbie to Chromebook and have no idea about recording screens on Chromebook. There is nothing to worry about! I am at your service. I have compiled this comprehensive guide on how to screen record on Chromebook.
Method 1- Via Keyboard Shortcut
The method is all about keyboard shortcuts. Individuals always seek easy methods to perform tasks, so I am presenting this to you. Let’s start!
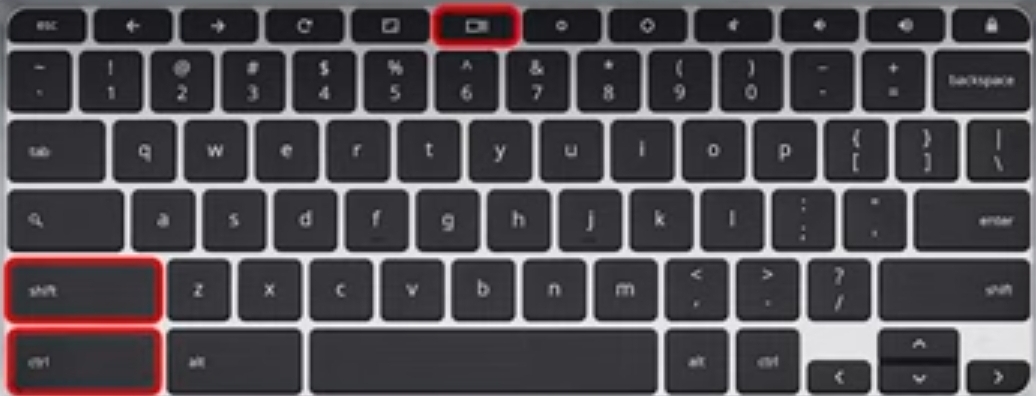
- Press Buttons: Get your eyes on your keyboard and press the Ctrl+Shift+Show Windows buttons simultaneously.
- Video Icon: A toolbar will pop up on the screen. Click on the video icon.
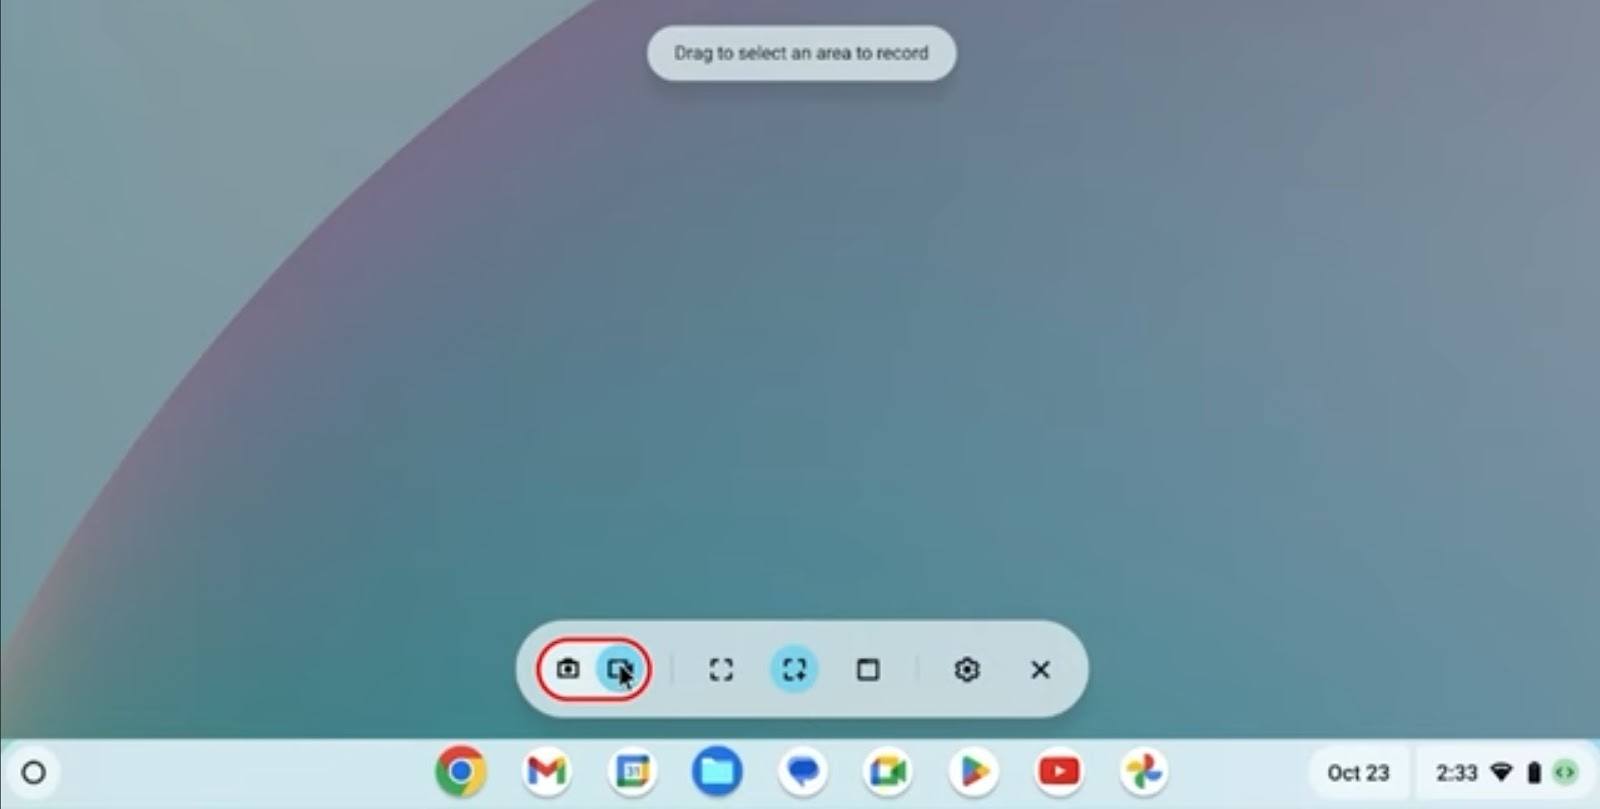
- Select the Area: Drag the area, you want to record.

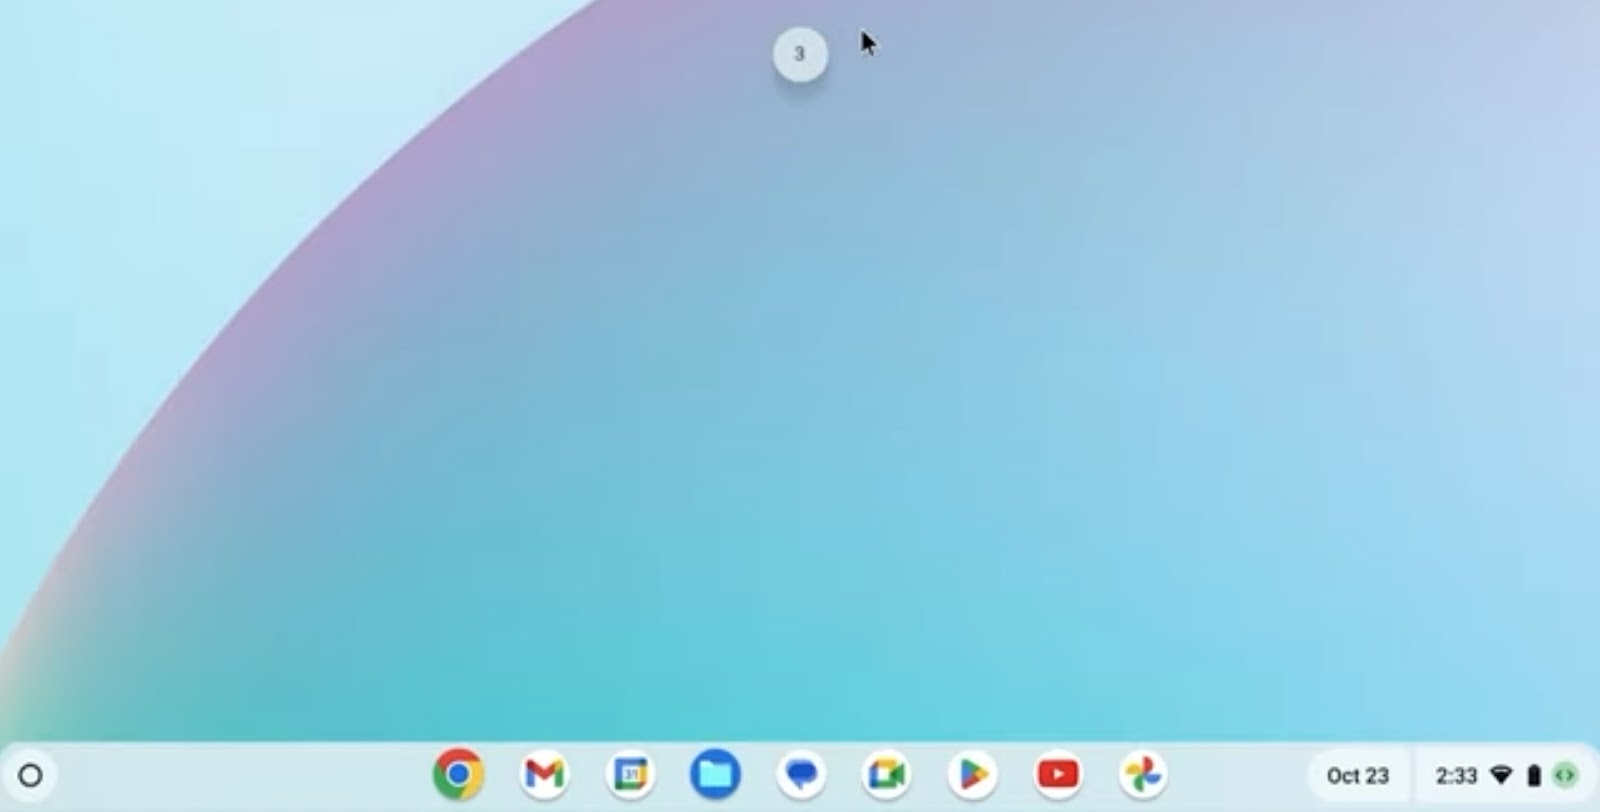
- Start Record: After this, a countdown will start to screen record on Chromebook.
- Stop Recording: After recording the process, you need to click on the red recording button on the right down.
- Download Recording: Finally, the last step is to ensure that your recording is saved or not. If not then you can download it from the download section in the recording settings.

Method 2- Via Built-In Screen Recorder
The second method is all about the built-in recording features of the Chromebook. Chromebook enables users to screen record by using its built-in recording features to get better outcomes in the long term. Now, if you have a Chromebook and don’t know how to use its built-in recorder to record screen. There is nothing to worry about because I have prepared a complete guide on how to screen record on Chromebook by using its built-in features. Let’s start.
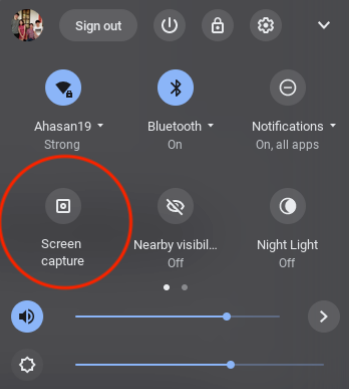
- Open the Quick Settings Menu: Firstly, you need to access the quick settings in the main menu or by searching on the taskbar. It will lead you to another display representing you with new options.
- Record with Audio: Now, there is an option for you to record your screen with audio. Sometimes, recording with audio becomes crucial but sometimes due to noisy areas, no one wants to record audio. Therefore, you are free to choose what you exactly want: recording with audio or not is your preference.
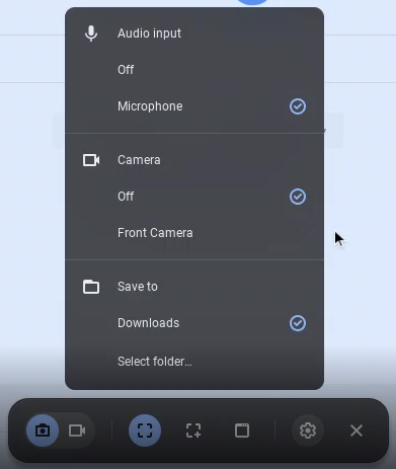
- Stop and Save: Finally, record the whole process, you wanted to. After recording the process step-by-step, you need to stop the recording and save it in your File Manager. This will provide you with chances to send or share it with others to deliver proper directions and instructions.
Recording screen is a significant concern for regular instructors, webinar organizers, and complex operation managers. On a Chromebook, it becomes essential because it runs a different operating system than other laptops. If you are a newbie to Chromebook, you may face hurdles to do so, but don’t worry!
I have compiled a comprehensive guide on how to screen record on Chromebook in the above section. You are free to follow the steps mentioned in the methods to screen record on Chromebook successfully. Stay with me to learn more interesting things about laptops! Until we meet again.
Q1- Can I screen record with audio?
Yes, you can screen record with audio but it depends on your preference. For instance, audio makes everything clear, but in a noisy area, you can disable the audio to record the screen peacefully.
Q2- How do I restrict screen recording?
You can restrict screen recording by using a proper multi-DRM setup to prevent screen recordings. Further, if you want to prevent screen recordings then you may use multiple applications to do so.
Q3- Can screen recording be hacked?
The answer to this question is yes. When you start recording your screen, there is a possibility that someone can hack your recording. You are free to use some security tools to ensure the security of your Chromebook.
Q4- Is screen recording calls illegal?
According to federal law, screen recording calls is legal until or unless you are also participating in the conversation. It reduces the chances of blackmailing and other illegal activities.
Q5- Does Chromebook allow me to record audio and video simultaneously?
Yes, Chromebook allows individuals to record audio and video simultaneously at any stage.

Network Automation And Orchestration Opportunities In 2024 – Technologist

AI Already Adopted By 78% Of Software Testers – Technologist

What is Digital Marketing? A Basic Guide – Technologist
About The Author
admin
Azeem Rajpoot, the author behind Technolo Gist, is a passionate tech enthusiast with a keen interest in exploring and sharing insights about the rapidly evolving world of technology. With a background in Technologist, Azeem brings a unique perspective to the blog, offering in-depth analyses, reviews, and thought-provoking articles. Committed to making technology accessible to all, Azeem strives to deliver content that not only keeps readers informed about the latest trends but also sparks curiosity and discussions. Follow Azeem on this exciting tech journey to stay updated and inspired.
